


Integrating Farspeak with Zapier
Automate Your AI Workflows

Integrating Farspeak with Zapier: Automate Your AI Workflows
Integrating Farspeak with Zapier allows you to automate workflows that involve AI-driven actions and data handling. This integration can streamline processes such as updating records, sending notifications, or enriching data, combining the best of both platforms.
What is Zapier?
Zapier is a popular automation tool that connects various web applications, allowing users to create automated workflows called "Zaps." Each Zap consists of a trigger (an event that starts the workflow) and actions (tasks performed automatically when the trigger occurs).
Setting Up Farspeak with Zapier
To get started with Farspeak and Zapier integration, you need to follow these steps:
Create a Zapier Account: If you don't already have one, sign up for a free account on Zapier.
Create a Farspeak Account: Ensure you have a Farspeak account and your API key ready.
Install the Farspeak npm Package: Ensure you have the Farspeak npm package installed in your project.

Connect Farspeak to Zapier: This can be done via a Webhook or a custom integration using Zapier's Developer Platform.
Example Workflow: Automatically Update Candidate Skills from Farspeak to Google Sheets
Let's create an example workflow where we automatically update a Google Sheet with candidate skills extracted by Farspeak.
Step 1: Set Up the Farspeak Script
First, set up a Farspeak script that writes candidate data:

Step 2: Create a Webhook in Zapier
Create a New Zap: Go to your Zapier dashboard and create a new Zap.
Choose a Trigger App: Select Webhooks by Zapier as the trigger app.
Select the Trigger Event: Choose "Catch Hook" and copy the unique webhook URL provided by Zapier.
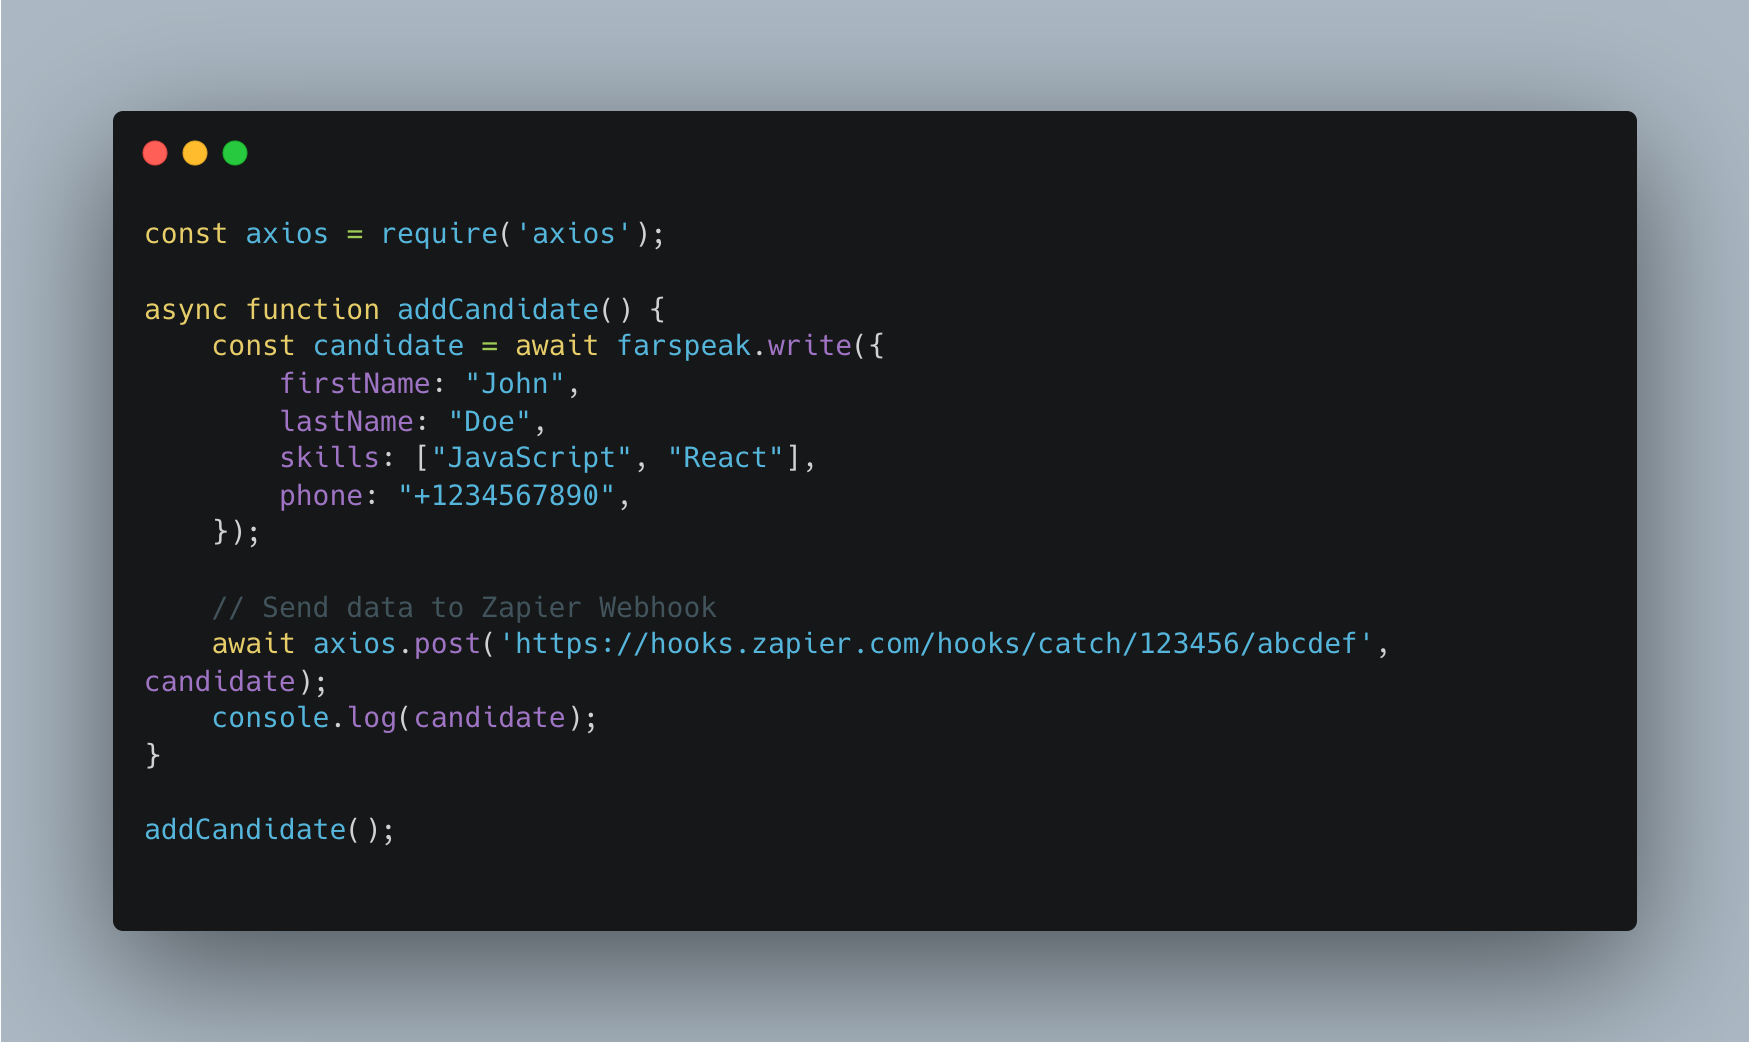
Step 3: Modify Farspeak Script to Trigger Zapier Webhook
Modify your Farspeak script to send a POST request to the Zapier webhook URL after writing the candidate data:
Step 4: Configure the Zapier Action
Add an Action: After setting up the trigger, add an action to your Zap.
Choose the Action App: Select Google Sheets as the action app.
Select the Action Event: Choose "Create Spreadsheet Row" or "Update Spreadsheet Row."
Connect Your Google Account: Authorize Zapier to access your Google Sheets.
Set Up Action: Map the fields from the Farspeak data to the columns in your Google Sheet.
Step 5: Test and Activate Your Zap
Test Your Zap: Ensure the data from Farspeak is correctly populating your Google Sheet.
Activate the Zap: Once everything is set up and tested, turn on your Zap.
Full Example Code
Here is the complete Farspeak script with the Zapier webhook integration:

Creating spreadsheets with Farspeak and Zapier
Now, in order to create spreadsheets (or manage tasks, etc.), one would to do the following:

We’ll provide lots of templates and make sure that building production-ready smart apps with Farspeak is easy.